Jim Besser Posted September 6, 2013 Share Posted September 6, 2013 For an upcoming gig, I need to go back to my Microvox mics (it will be a very noisy environment and I need to use a personal monitor so I can hear myself; running the Microvox thru a DI box, with one output going directly to the monitor, solves this problem).. In the past I have velcroed the mics just above the handrests (this is an Anglo), toward the center. This is the position suggested in a photo in the Microvox instructions. But that's awkward because the cord is always getting in the way. I'm wondering if anybody has experience with different placement. To avoid tangled cords, the ideal place to put the pickups would be above the buttons. Has anybody tried this, and what's the impact on sound? Link to comment Share on other sites More sharing options...
Jim Besser Posted September 7, 2013 Author Share Posted September 7, 2013 Never mind, I figured it out. Placement above the buttons doesn't work - gets in the way of the fingers. What turned out to be the best placement: on the handrests, facing the top of the concertina. The sound seems a little better when the mic isn't directly on the scrollwork. I also wrapped elcro around the first inch or two of cable and stick it to the velcro on the handrest; that keeps it from moving around too much while playing. I also had to replace the jacks on the mic cables; they were making a terrible crackling sound when I moved around. All fixed now. We'll see how it stands up to robust ceilidh playing on a big sound system tomorrow! Link to comment Share on other sites More sharing options...
AnnC Posted September 9, 2013 Share Posted September 9, 2013 The twin microvox pickups on mine are positioned just above the handrests on either side, the little black square in my profile picture is the bit of velcro it sticks to. It's worked fine for the past 20 years, 10 of those were playing in a ceilidh band Link to comment Share on other sites More sharing options...
jaspeter Posted September 15, 2013 Share Posted September 15, 2013 I have cheap omnidirectional lavalier mics that I Velcro on the handrests toward the back of the instrument, so they're under my palms/wrists. This positioning seems to minimize button-noise and ambient noise since they're somewhat pointed toward my body. I also use the 3M Command Strip Velcro with the hope that it will come off cleanly when I need to finally remove it. I was concerned that the placement would selectively amplify those notes with valves toward the back, but I can't say I've really noticed that to be a problem. Link to comment Share on other sites More sharing options...
wayman Posted September 15, 2013 Share Posted September 15, 2013 Aaron Marcus uses two Audio Technica PRO-35s, which come on a flexible stalk with a sturdy clip on the other end. He clips them directly to the bellows (!) on the fold closest to each side, with the stalks curled so the microphones point inwards towards the fretwork from slightly above (and out of the way of) the fingers. I was very skeptical when I first saw this, but it works great; and I played his concertina briefly on-stage while everything was set up, and I couldn't tell by feel that anything was out of the ordinary; the amplified sound was clear and even; and it didn't appear to me that this was adding much extra wear to the bellows leather. The one downside is that this gives you two XLR cables to plug into the mixer, unless you have some sort of personal mixer which can reduce them to a single cable that goes into the main mixer. The nice thing about the MicroVox system is that it takes care of that for you. Link to comment Share on other sites More sharing options...
Jody Kruskal Posted September 15, 2013 Share Posted September 15, 2013 I've used the MicroVox mics that I bought decades ago and played through them at hundreds of dances over the years. I custom made velcro attached spacers to hold the mics. They are about 1 1/2 inches long and attach with velcro at the forward hex points of the frame and angle the mics in toward the buttons. The materials I used were two corners of a plastic milk bottle reinforced with wire and hot glue. A bit crude, but they work well for me. Link to comment Share on other sites More sharing options...
Jim Besser Posted September 17, 2013 Author Share Posted September 17, 2013 I've used the MicroVox mics that I bought decades ago and played through them at hundreds of dances over the years. I custom made velcro attached spacers to hold the mics. They are about 1 1/2 inches long and attach with velcro at the forward hex points of the frame and angle the mics in toward the buttons. The materials I used were two corners of a plastic milk bottle reinforced with wire and hot glue. A bit crude, but they work well for me. I"m not quite clear on what you're saying. Where are the spacers, and why do you use them? How about a pic? In my experimentation I found that moving the mics to the top side of the handrests seemed to produce the best sound, with the added advantage that I could velcro the trailing cord to the handrail to keep it out of the way. I put the velcro on the side of the mic, not on the front surface, so the front surface is not directly on the concertina end. This seemed to produce a somewhat less harsh tone. I also had to rewire much of the Microvox. I was getting terrible crunching sounds when I moved; I traced it to a bad plug on one of the mics. Replaced it and the crunching was gone. Link to comment Share on other sites More sharing options...
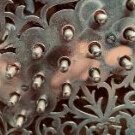
Jody Kruskal Posted October 10, 2013 Share Posted October 10, 2013 (edited) I've used the MicroVox mics that I bought decades ago and played through them at hundreds of dances over the years. I custom made velcro attached spacers to hold the mics. They are about 1 1/2 inches long and attach with velcro at the forward hex points of the frame and angle the mics in toward the buttons. The materials I used were two corners of a plastic milk bottle reinforced with wire and hot glue. A bit crude, but they work well for me. I"m not quite clear on what you're saying. Where are the spacers, and why do you use them? How about a pic? In my experimentation I found that moving the mics to the top side of the handrests seemed to produce the best sound, with the added advantage that I could velcro the trailing cord to the handrail to keep it out of the way. I put the velcro on the side of the mic, not on the front surface, so the front surface is not directly on the concertina end. This seemed to produce a somewhat less harsh tone. I also had to rewire much of the Microvox. I was getting terrible crunching sounds when I moved; I traced it to a bad plug on one of the mics. Replaced it and the crunching was gone. Hi Jim, here is a photo of my homemade mic extenders. Edited October 10, 2013 by Jody Kruskal Link to comment Share on other sites More sharing options...
cboody Posted October 10, 2013 Share Posted October 10, 2013 Those interested in homebrew might want to look at these: http://www.radioshack.com/product/index.jsp?productId=2062216&locale=en_US I believe there was a thread discussing them out here (or at least somewhere I read!) Link to comment Share on other sites More sharing options...
Jody Kruskal Posted October 10, 2013 Share Posted October 10, 2013 Those interested in homebrew might want to look at these: http://www.radioshack.com/product/index.jsp?productId=2062216&locale=en_US I believe there was a thread discussing them out here (or at least somewhere I read!) Those look exactly like the ones inside of the Microvox... are they? The good thing about having velcro attachments is that when I switch concertinas, they are easy off, easy on. Link to comment Share on other sites More sharing options...
cboody Posted October 11, 2013 Share Posted October 11, 2013 Those interested in homebrew might want to look at these: http://www.radioshack.com/product/index.jsp?productId=2062216&locale=en_US I believe there was a thread discussing them out here (or at least somewhere I read!) Those look exactly like the ones inside of the Microvox... are they? The good thing about having velcro attachments is that when I switch concertinas, they are easy off, easy on. I've no idea if they are the same, but I know that years ago I had someone create a stereo set of these for me that used phantom power from the recorder and they were really very good indeed. I'm enough of an electronic klutz to not do it myself, but others can... Link to comment Share on other sites More sharing options...

Recommended Posts
Create an account or sign in to comment
You need to be a member in order to leave a comment
Create an account
Sign up for a new account in our community. It's easy!
Register a new accountSign in
Already have an account? Sign in here.
Sign In Now